


Integration clients
Add the systems you connect to Superwise, choose the events they share, switch them on or off, and change or delete them.
- Where to find it
- Company settings > Integration Setup
- Who can use it
- People who have the View Integrations permission. Adding needs Add, changing needs Edit and deleting needs Delete.
An integration client is another system that exchanges records with Superwise. The page Integration Clients lists the clients of your company. For each client you set the connection details, the events that pass between the systems, and a small function that creates the sign-in header.
Before you start
- Get from the other system: its base web address and its way of signing you in.
- Get its rate limit. This is the request limit the other system gives you.
- Have its logo as an image smaller than 100 kb.
- Know which Superwise user the integration should act as. See Users.
How to add an integration client
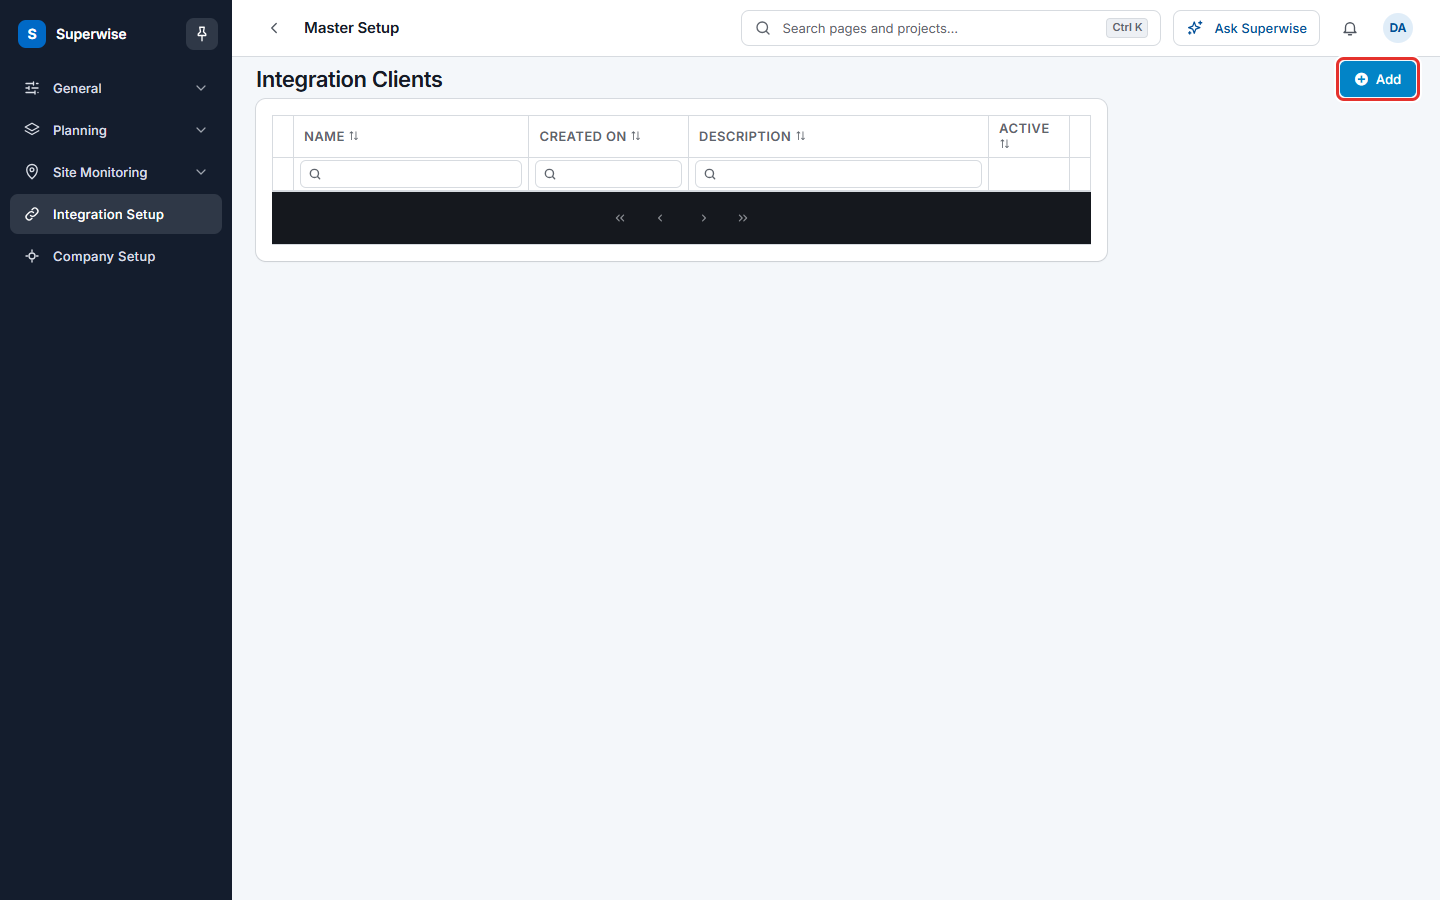
- Open Company settings in the left menu, then click Integration Setup.
- Click Add (mark 1 in the first picture).
- On step 1, Client Info, fill in the fields. See the table below. Name is marked 1 in the second picture and Authentication Mechanism is marked 2.
- Click the arrow at the bottom (mark 3) to go to step 2, Events To Subscribe.
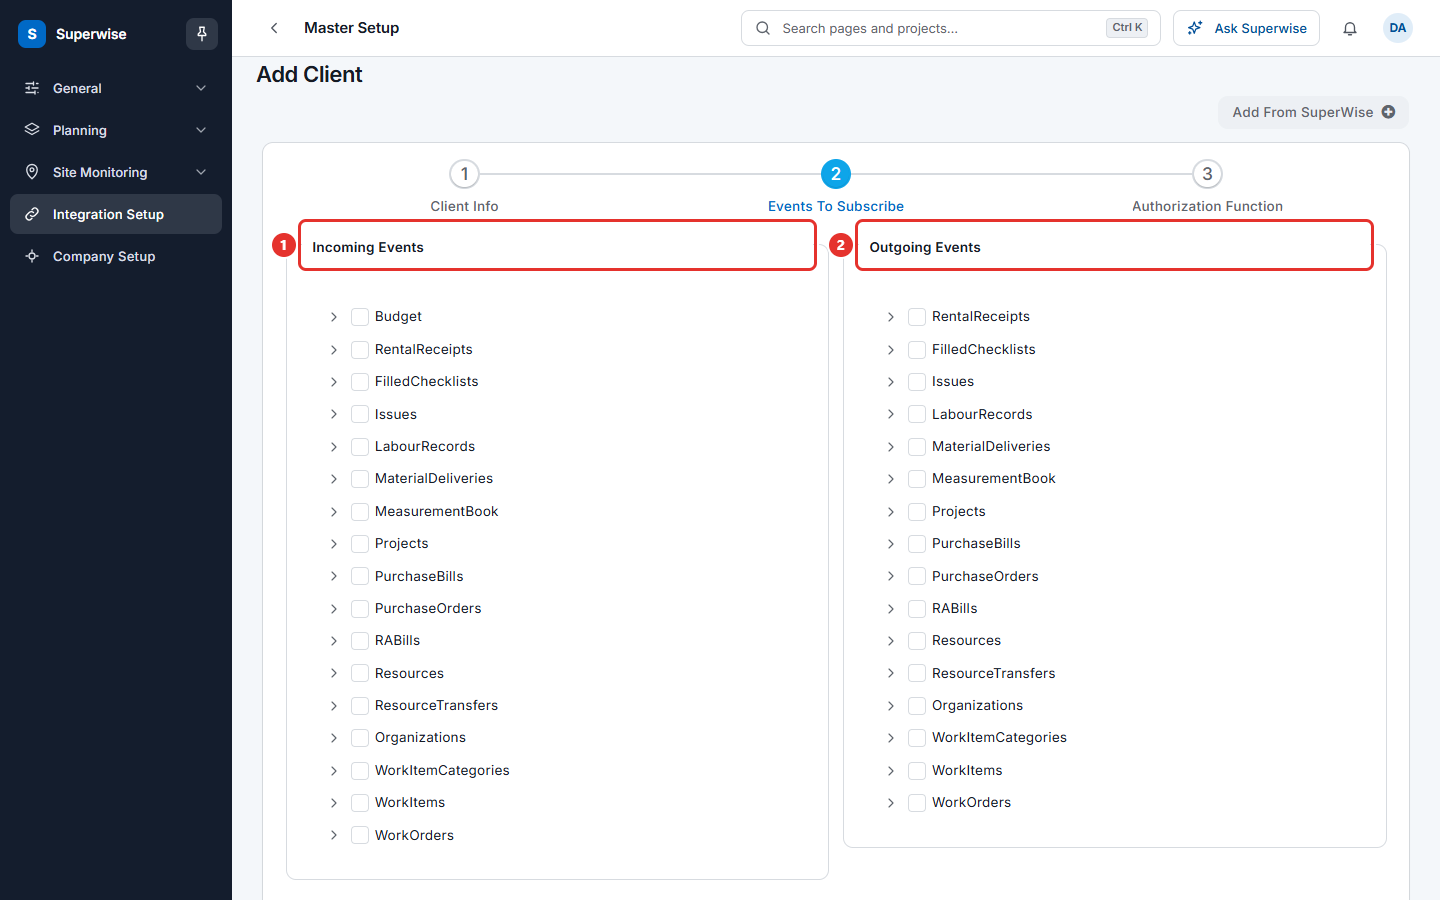
- Tick the events this client shares. The left box, Incoming Events, lists what the client can send to Superwise. The right box, Outgoing Events, lists what Superwise can send to the client. Open a group to see its operations.
- Click the arrow again to go to step 3, Authorization Function. Write the function that returns the sign-in headers for later requests.
- Click SAVE (mark 4). A message says Client Saved. The button stays grey until the logo is uploaded and all required fields are filled.
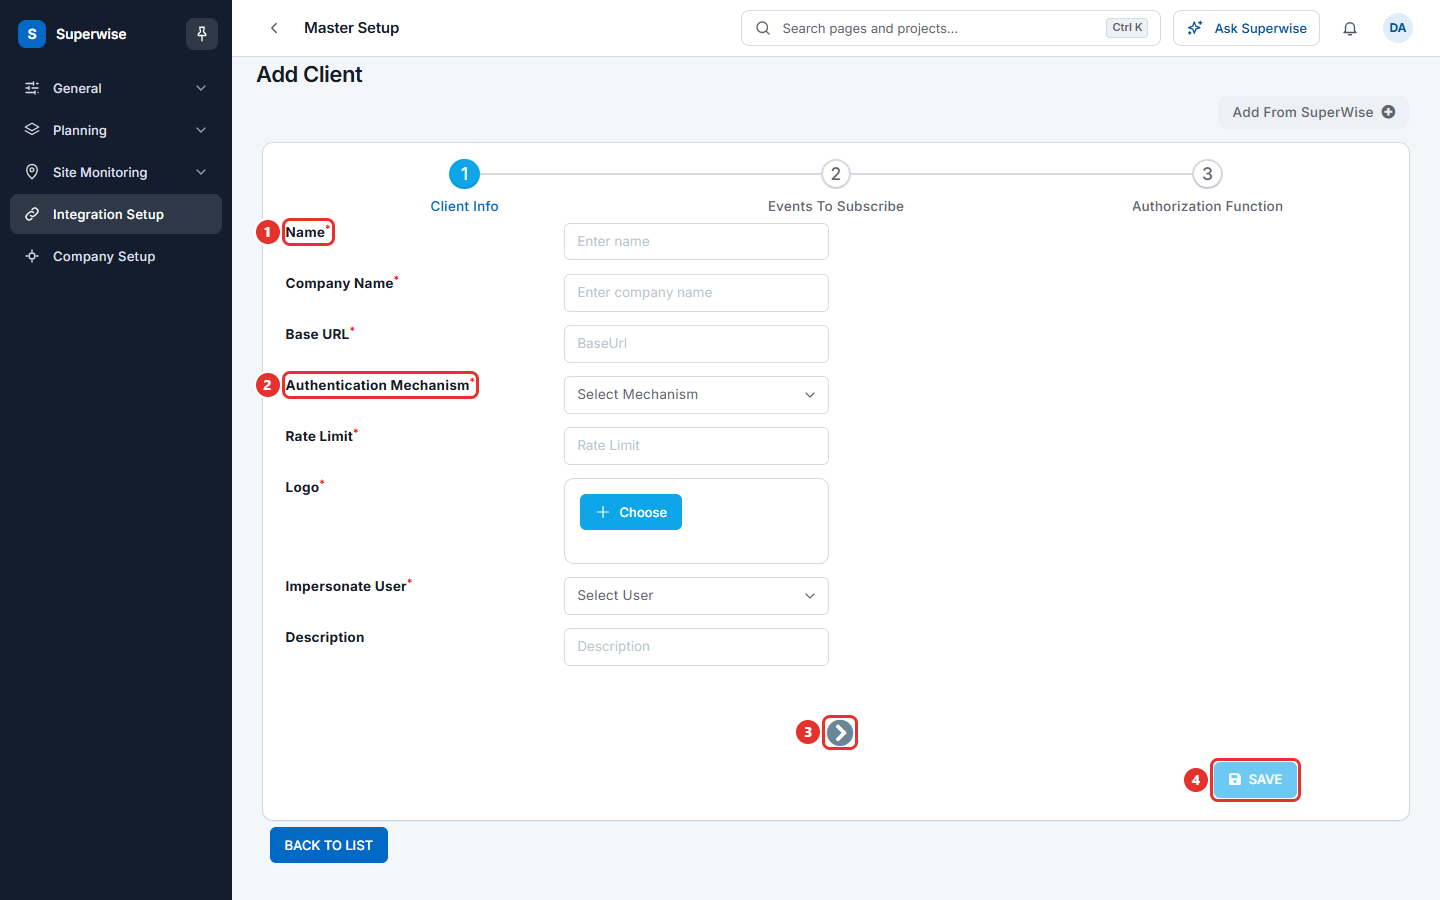
After the first save, the fields Client Id and Client Secret show at the top of step 1. The other system may need them.
How to add a ready-made client
Superwise can offer ready-made clients. When some are offered, a button Add From SuperWise shows at the top right of the form.
- Click Add From SuperWise. A card shows for each ready-made client, with its logo and description.
- Tick Add on the clients you want. A card that shows Added is already in your list.
- Click Add at the bottom. Click Cancel to go back to the normal form.
How to switch a client on or off
- In the list, find the client. The column Active has a switch with the words Active and Inactive.
- Click the switch.
- If the client uses O auth 2, Superwise sends you to the website of the other system to give your consent. The message says "Waiting for confirmation from ... website". When you come back, a message says that the client "has been authenticated and marked active".
- For other clients, a message says that the client has been marked active or inactive.
If Superwise cannot switch the client on, it shows Client not activated with the reason.
How to see the details of a client
- In the list, click the arrow at the start of the row.
- The tab Events lists the events of the client. See Integration events.
- The tab More Details shows Created On, Client Id and Client Secret.
How to change or delete a client
- In the list, click the three dots at the end of the row.
- Choose Edit to open the form again, or Delete.
- For Edit, change the fields and click SAVE.
- For Delete, read the question "Confirm deletion of the Client ?" and click Confirm. A message says Client Deleted.
What the fields mean
| Name | What it means |
|---|---|
| Name | The name of the client. Required. It cannot be used twice. |
| Company Name | The name of the company that runs the other system. Required. |
| Base URL | The main web address of the other system. Required. |
| Authentication Mechanism | How Superwise signs in to the other system: Custom or O auth 2. Required. |
| Rate Limit | The request limit of the other system, as the other system gives it to you. Required. |
| Logo | A picture of the other system, smaller than 100 kb. Required. Click Choose to add it. |
| Impersonate User | The Superwise user that the integration acts as. Required. |
| Description | A note about the client. |
| Authorization Function | Step 3. A function that returns the headers needed to send later requests. Required. |
When you choose O auth 2, a group OAuth Configuration opens. All of its fields are required.
| Name | What it means |
|---|---|
| Client ID | The identifier the other system gave you. |
| Client Secret | The secret the other system gave you. |
| Environment | Sandbox or Production. |
| Scope | The permissions asked from the other system. |
| State | A security value, for example security_token. |
| Authorization Endpoint | The address where you give consent. |
| Token Endpoint | The address that gives the access token. |
| Refresh Token Endpoint | The address that renews the access token. |
What the columns mean
| Name | What it means |
|---|---|
| Name | The name of the client. |
| Created On | The date and time the client was added. |
| Description | The note about the client. |
| Active | The switch for the client. |
Rules to know
- A client name cannot repeat. The message is "Client with same name already exists."
- You cannot save without a logo.
- You cannot choose the same operation of the same area as an incoming event and an outgoing event. The message is "Error in events subscribred".
- For a client added with Add From SuperWise, the name cannot be changed.
If something goes wrong
| What you see | What to do |
|---|---|
| The button SAVE is grey. | Fill in every required field and upload the logo. |
| Client with same name already exists. | Use another name. |
| Error in events subscribred | Remove the operation from either Incoming Events or Outgoing Events. |
| Client not activated | Read the reason that follows. Check the details with the other system. |
| Client Not Deleted. | Read the reason that follows. |
| Client wasn't found. | The client was already removed. Reload the page. |