


Material transfers
Move material from one project to another, follow the transfer until the other site receives it, and reject or delete a transfer.
- Where to find it
- Stores > Material Transfers
- Who can use it
- People who have the View permission on Resource Transfers. Creating, receiving and rejecting need Add. Editing needs Edit. Deleting needs Delete.
A material transfer moves material from one project to another project of your company. For example, Acme Heights has 200 bags of cement more than it needs. Acme sends 50 bags to another project. The sending site records a transfer. The other site records the receipt.
This screen lists the transfers of the project you have selected. The same screen also handles tools. Tool transfers have their own page: see Tool transfers.
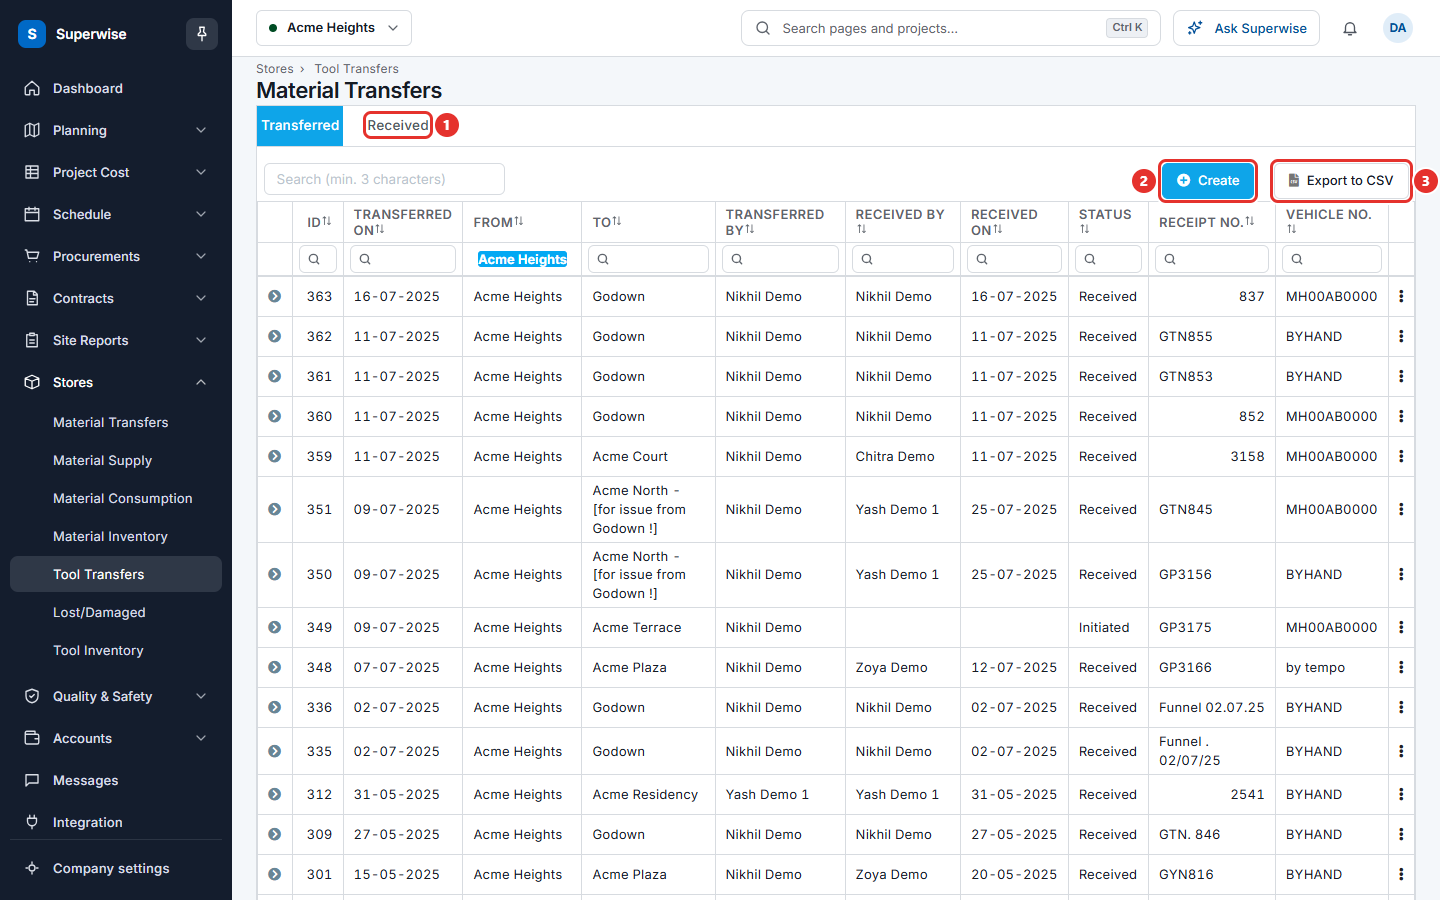
How a transfer works
- The sending project saves a transfer. Its status is Initiated. The stock of the sending project goes down.
- The receiving project opens the transfer in the Received tab and records what arrived. The status becomes Received. The stock of the receiving project goes up.
- If the receiving project refuses the material, it rejects the transfer. The status becomes Rejected.
See Create a material transfer and Receive a material transfer.
Before you start
- Select the project in the project selector at the top of the screen. The lists show this project only.
- The sending project must have the material in stock. You cannot send more than the stock.
- You need the Add permission on Resource Transfers to create, receive or reject a transfer.
How to find a transfer
- Open Stores > Material Transfers.
- Choose the Transferred tab to see transfers that your project sent. Choose the Received tab to see transfers that were sent to your project.
- Use the Search (min. 3 characters) box, or the filter fields under the column names.
The Received tab shows a number when transfers are waiting for you. The number counts the transfers with the status Initiated.
Click the arrow at the start of a row to open its details. The details have these tabs:
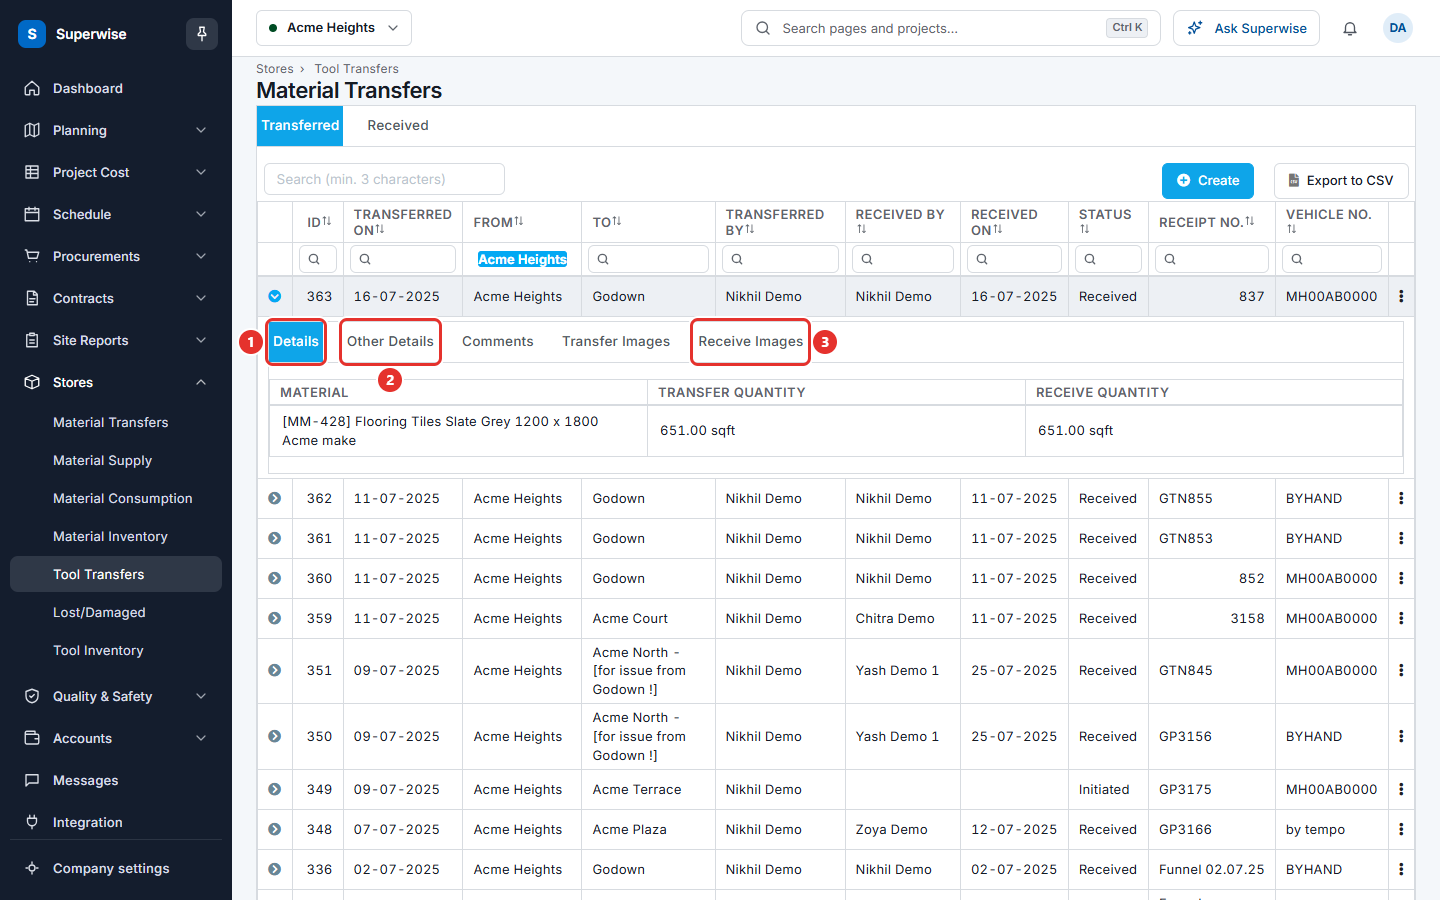
- Details: each material with Transfer Quantity and Receive Quantity.
- Other Details: transporter, dates, receipt number, vehicle number, notes, and the place where the transfer was saved.
- Comments: comments written when the transfer was received or rejected.
- Transfer Images and Receive Images: photos added with the transfer or the receipt, if any.
How to use the row menu
Click the three dots at the end of a row. The menu shows only the actions that you can do for that row.
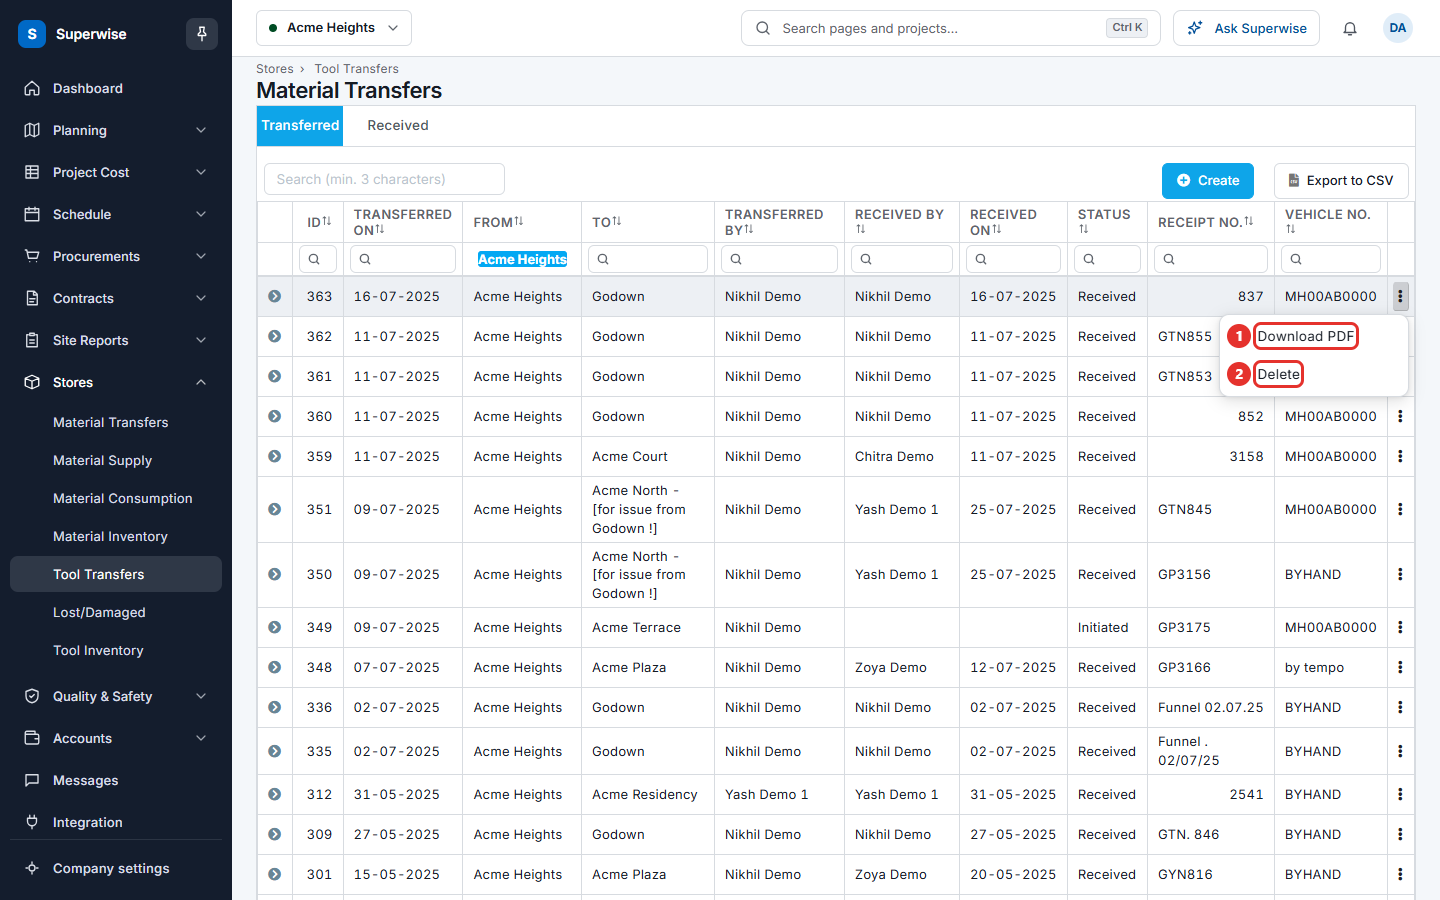
| Menu item | When it appears |
|---|---|
| Edit | The transfer is Initiated, was made from a project, and you have the Edit permission. |
| Receive | The transfer is Initiated and you have the Add permission. |
| Reject | The transfer is Initiated and you have the Add permission. |
| Download PDF | Always, for people who can view the list. |
| Delete | You have the Delete permission. |
To reject or delete a transfer, choose the menu item and click Confirm in the Confirm Action box. Click Cancel to stop.
To download the PDF, choose Download PDF. In Additional Options, choose Include only Categories or Include only Materials, then click Download.
To save the list as a file, click Export to CSV. The file follows the filters you set.
What the columns mean
| Name | What it means |
|---|---|
| ID | The number of the transfer. |
| TRANSFERRED ON | The date and time the sending project saved the transfer. |
| FROM | The sending project. |
| TO | The receiving project. |
| TRANSFERRED BY | The person who saved the transfer. |
| RECEIVED BY | The person who recorded the receipt. |
| RECEIVED ON | The date and time of the receipt. |
| STATUS | Initiated, Received, Rejected or Cancelled. |
| RECEIPT NO. | The receipt or challan number that the sender typed. |
| VEHICLE NO. | The vehicle registration number that the sender typed. |
Rules to know
- You can edit a transfer only while its status is Initiated.
- You cannot reject a transfer that is already rejected.
- You cannot reject or delete a transfer when the material it brought was already used or sent to another project. The screen shows the message "The materials received under this transfer has been transferred to other site."
- When the receiving project records less than the sender sent, the missing quantity is written to the lost list. See Lost and damaged tools and material.
If something goes wrong
| What you see | What to do |
|---|---|
| The Edit item is missing | The transfer is no longer Initiated, or it came from a purchase order. Create a new transfer instead. |
| A message says the material was transferred to other site | The material is already gone from the receiving project. You cannot reject or delete this transfer. |
| The Received tab is empty | Check that the project selector shows the receiving project. |
Related pages
- Create a material transfer
- Receive a material transfer
- Material inventory
- Lost and damaged tools and material