


Resolve, re-open and close an issue
Mark an issue as fixed, send it back if the fix is not good, close it, and add comments, attachments or a debit note.
- Where to find it
- Quality & Safety > Issues
- Who can use it
- People who have the View permission on Issues. The right to resolve, close or re-open depends on your role in the issue. See Rules to know.
An issue moves from Open to Resolved to Closed. The person who fixes the problem resolves it. The person who reported it checks the fix and closes it. All these actions are in the row menu of the issue.
For example, a crane at Acme Heights was not available. The site engineer who was assigned the issue resolves it when the crane is back. The person who reported the issue checks and closes it.
Before you start
- Open Quality & Safety > Issues and select the project.
- You need to be one of the people who may act on the issue. See Rules to know.
How to resolve an issue
- In the list, click the three dots at the end of an Open issue.
- Choose Resolve. If you may also close the issue, the item is Resolve & Close.
- In the box, type a Comment about the fix. The comment is optional here.
- Click Resolve, or Resolve & Close.
The message "Issue successfully resolved!" shows and the status changes.
How to close an issue
- Click the three dots at the end of a Resolved issue.
- Choose Close.
- Type a Comment if you want to. It is optional.
- Click Close.
The message "Issue successfully closed!" shows.
How to re-open an issue
Re-open an issue when the fix is not good.
- Click the three dots at the end of a Resolved issue.
- Choose Re-open.
- Click Confirm in the Confirm Action box.
The status goes back to Open. You can then edit the issue.
How to add comments and attachments
- Click the three dots at the end of any issue.
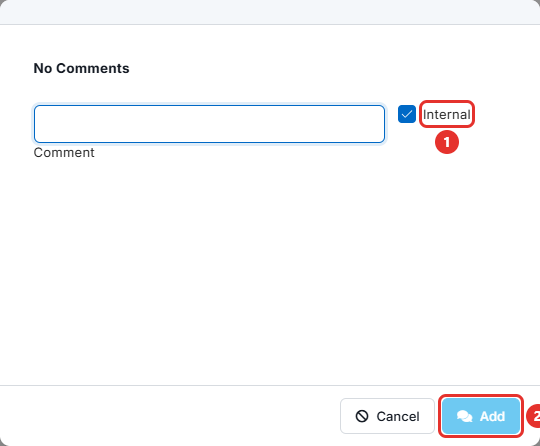
- Choose Add Comments and type your text in Comment, then click Add. A comment is required here.
- Or choose Add Attachments, add your files and click Save.
The box shows earlier comments above the Comment field. The Internal box is ticked when the box opens.
How to change the assignee
- Click the three dots at the end of an Open issue. You need the Edit permission.
- Choose Change Assignee.
- In Change Issue Assignee, choose the new person.
- Click Confirm.
The message "Issue Assignee Change Successful!" shows. The list of people comes from the department of the issue when it has one.
How to create a debit note
A debit note charges the organization that caused the problem.
- Click the three dots at the end of the issue.
- Choose Create Debit Note. A panel named Create vendor ledger opens on the right.
- Fill in the panel and save it.
This item shows only when the issue names an organization, the issue has no debit note yet, and you may add debit notes. When the issue has a debit note, its Debit Note tab shows the Debit Reason and the Amount. To see the tab, choose View Details.
Rules to know
- These people can resolve an Open issue:
- the person who reported it
- a user of the organization linked to the issue
- the assignee
- a user with a role above the role of the assignee
- These people can close or re-open a Resolved issue:
- the person who reported it
- a user with a role above the role of the reporter
- You cannot resolve an issue that is already Resolved. You cannot close or re-open an issue that is not Resolved.
- Users from a contractor organization can resolve an issue that is linked to their organization. They cannot close or re-open it.
If something goes wrong
| What you see | What to do |
|---|---|
| Issue is already Resolved | The issue was resolved before you. Refresh the list. |
| You do not have the permission to resolve this Issue | Ask the assignee or the person who reported the issue. |
| Only Resolved Issue can be closed | Resolve the issue first. |
| You do not have the permission to close this Issue | Ask the person who reported the issue. |
| Only Resolved Issue can be re-opened | The issue is not Resolved. |
| You do not have the permission to re-open this Issue | Ask the person who reported the issue. |