


Receive a material transfer
Record the material that arrived at your project from another project, or reject the transfer.
- Where to find it
- Stores > Material Transfers
- Who can use it
- People who have the Add permission on Resource Transfers.
Use this form when material arrives at your project from another project. You check each quantity against what the sender saved and then save the receipt. The stock of your project goes up by the quantity you receive.
Before you start
- The sending project must have saved a transfer to your project. See Create a material transfer.
- Select your project in the project selector at the top of the screen.
- The transfer must have the status Initiated.
How to receive a transfer
- Open Stores > Material Transfers.
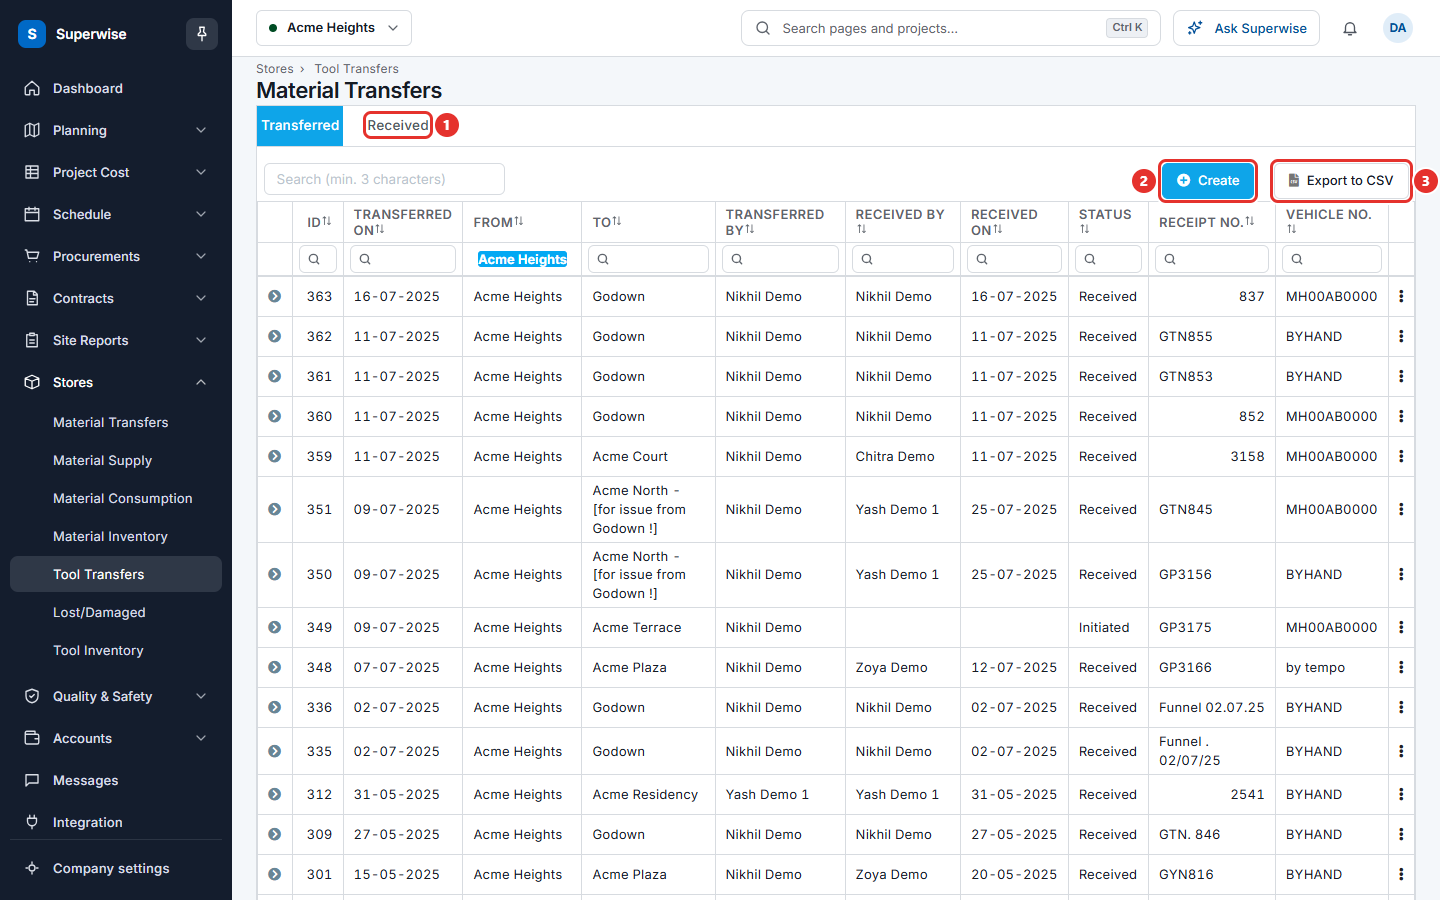
- Click the Received tab (mark 1 in the picture below). It lists the transfers sent to your project.
- Click the three dots at the end of the row and choose Receive.
- Read the left side of the form. It shows Transfer From, Transfer To, Transfer Date, Receipt Number and Vehicle Registration Number. You cannot change them.
- In Receive Date, choose the date and time of arrival.
- In the table, type Received Quantity for each material. Compare it with Transfered Quantity. Type less if less arrived.
- Use Comment for a note about the receipt. The Notes field shows the note of the sender.
- Click Save.
If you typed a quantity lower than the sent quantity, the screen asks for a confirmation. Click Yes to continue or No to go back.
What the fields mean
| Name | What it means |
|---|---|
| Receive Date | When the material arrived. |
| Received Quantity | The quantity that arrived. It cannot be below 0 and cannot be above the transferred quantity. |
| Transfered Quantity | The quantity the sender saved. You cannot change it. |
| Material Category and Material | What was sent. You cannot change them. |
| Comment | Your note about the receipt. |
How to reject a transfer
Reject a transfer when the material is not accepted at your project.
- In the Received tab, click the three dots at the end of the row.
- Choose Reject.
- Click Confirm in the Confirm Action box.
The status becomes Rejected.
Rules to know
- Receive Date cannot be before the Transfer Date.
- Receive Date cannot be in the future.
- You must record every material of the transfer. You cannot leave a row out.
- When you receive less than the sender saved, the screen says: "Some items have Transfer Qty greater than Receive Qty. These items will be marked as lost." The missing quantity goes to the lost list. See Lost and damaged tools and material.
- After the transfer is Received, you cannot reject or delete it if the material was already used or sent on to another project.
If something goes wrong
| What you see | What to do |
|---|---|
| Resource Transfer already completed. | Someone already received this transfer. Open the list to see its status. |
| Receive date cannot be before Transfer date. | Choose a date after the Transfer Date. |
| Receive date cannot be a future date. | Choose today or an earlier date. |
| Receive Quantity cannot be less than 0 (zero) for any Material | Type 0 or more in every row. |
| The Receive item is missing | The transfer is not Initiated, or you do not have the Add permission. |