


Tool transfers
Send tools from your project to another project, receive tools that arrive, and reject or delete a tool transfer.
- Where to find it
- Stores > Tool Transfers
- Who can use it
- People who have the View permission on Resource Transfers. Creating, receiving and rejecting need Add. Editing needs Edit. Deleting needs Delete.
A tool transfer moves tools from one project to another project of your company. For example, Acme Heights sends 2 concrete vibrators to another project. The sending site saves a transfer. The other site records the receipt.
Tools that you buy on a purchase order (PO) also arrive as a tool transfer. These transfers have no sending project. They wait in the Received tab until the site receives them.
Before you start
- Select the project in the project selector at the top of the screen.
- To send tools, the project must have them in stock. See Tool inventory.
- You need the Add permission on Resource Transfers to create, receive or reject a transfer.
How to find a transfer
- Open Stores > Tool Transfers.
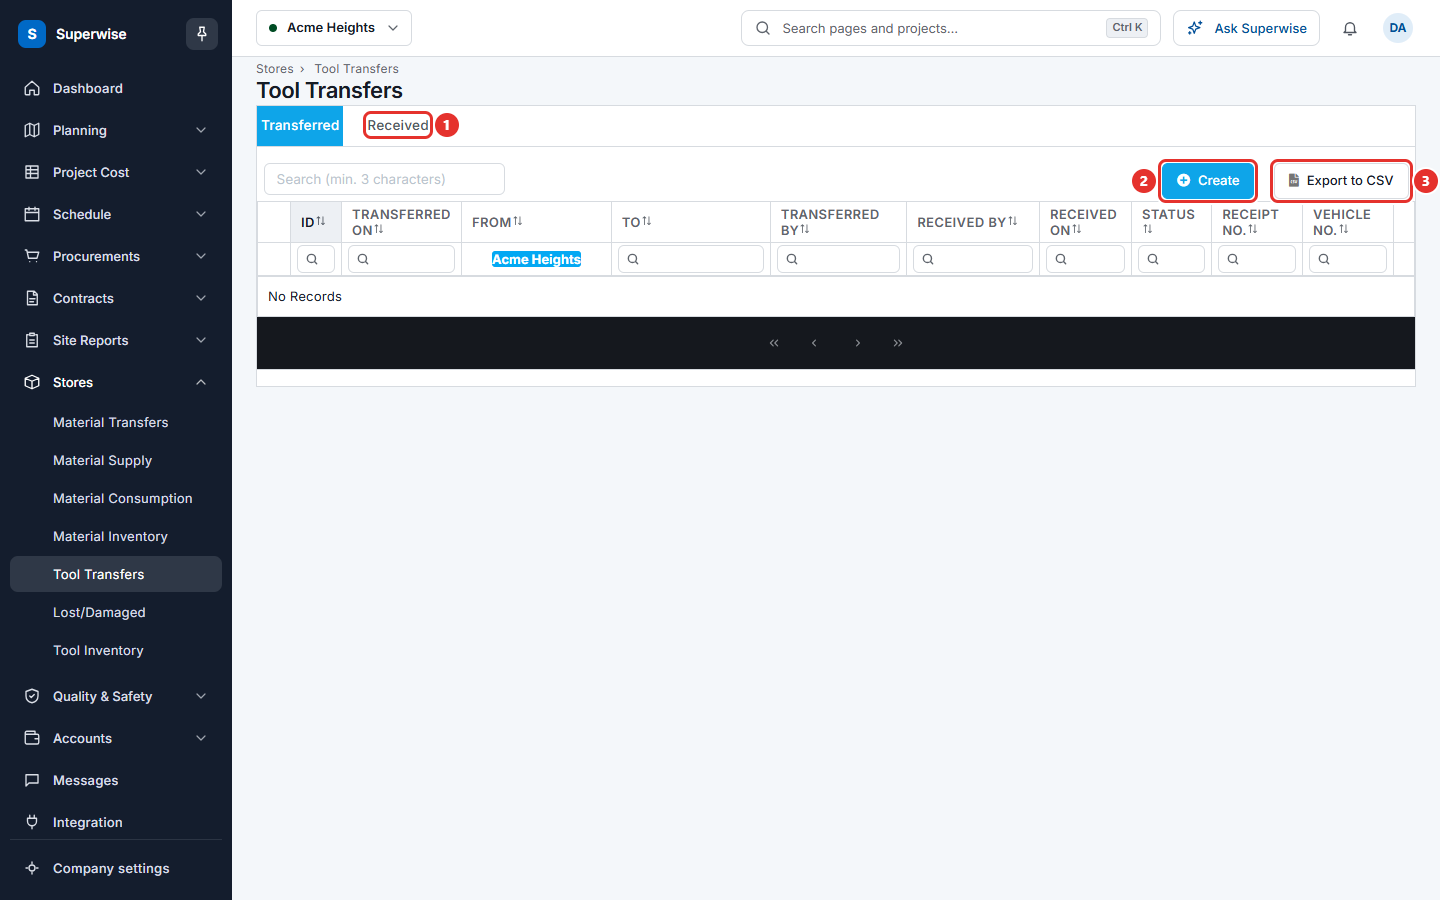
- Choose the Transferred tab for transfers that your project sent. Choose the Received tab for transfers that were sent to your project. The Received tab shows a number when transfers with the status Initiated wait for you.
- Use the Search (min. 3 characters) box or the filters under the column names.
- Click the arrow at the start of a row to see the details. The tab Details lists each tool with Transfer Quantity and Receive Quantity. The tab Other Details shows the transporter, the dates, the receipt number and the vehicle number. For a purchase order transfer, it also shows the Purchase Order No. and the Supplier.
Click Export to CSV to save the list as a file.
How to send tools
- Click Create.
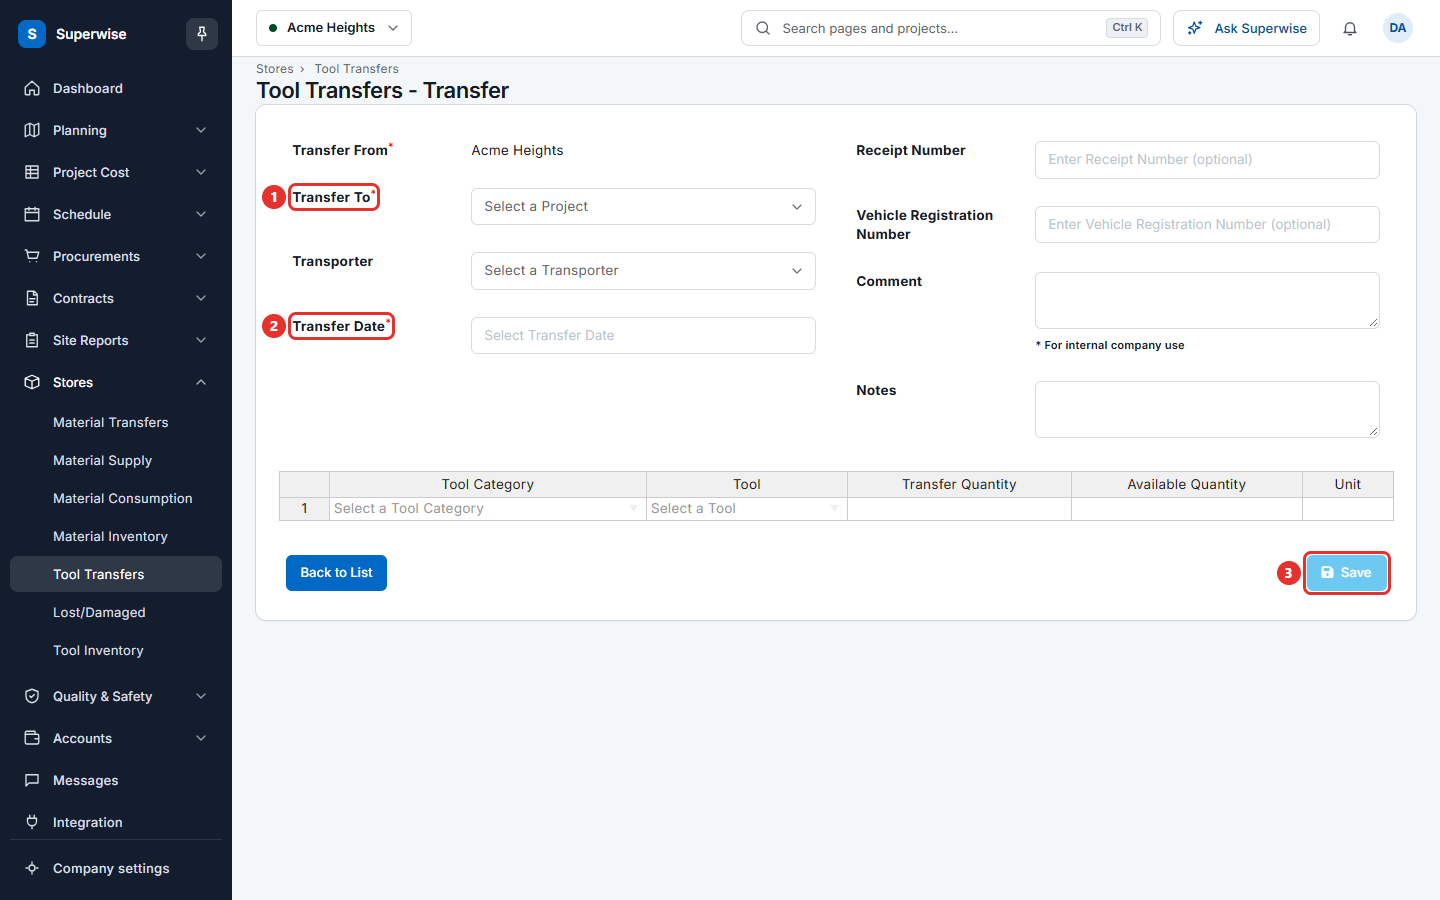
- In Transfer To, choose the receiving project (mark 1). The sending project is shown in Transfer From.
- Choose a Transporter if one carries the tools. This is optional.
- In Transfer Date, choose the date and time (mark 2). The latest date you can choose is 2 days from today.
- Type the Receipt Number and the Vehicle Registration Number if you have them. Both are optional.
- Use Comment for notes inside your company. Use Notes for notes that the receiving site should read.
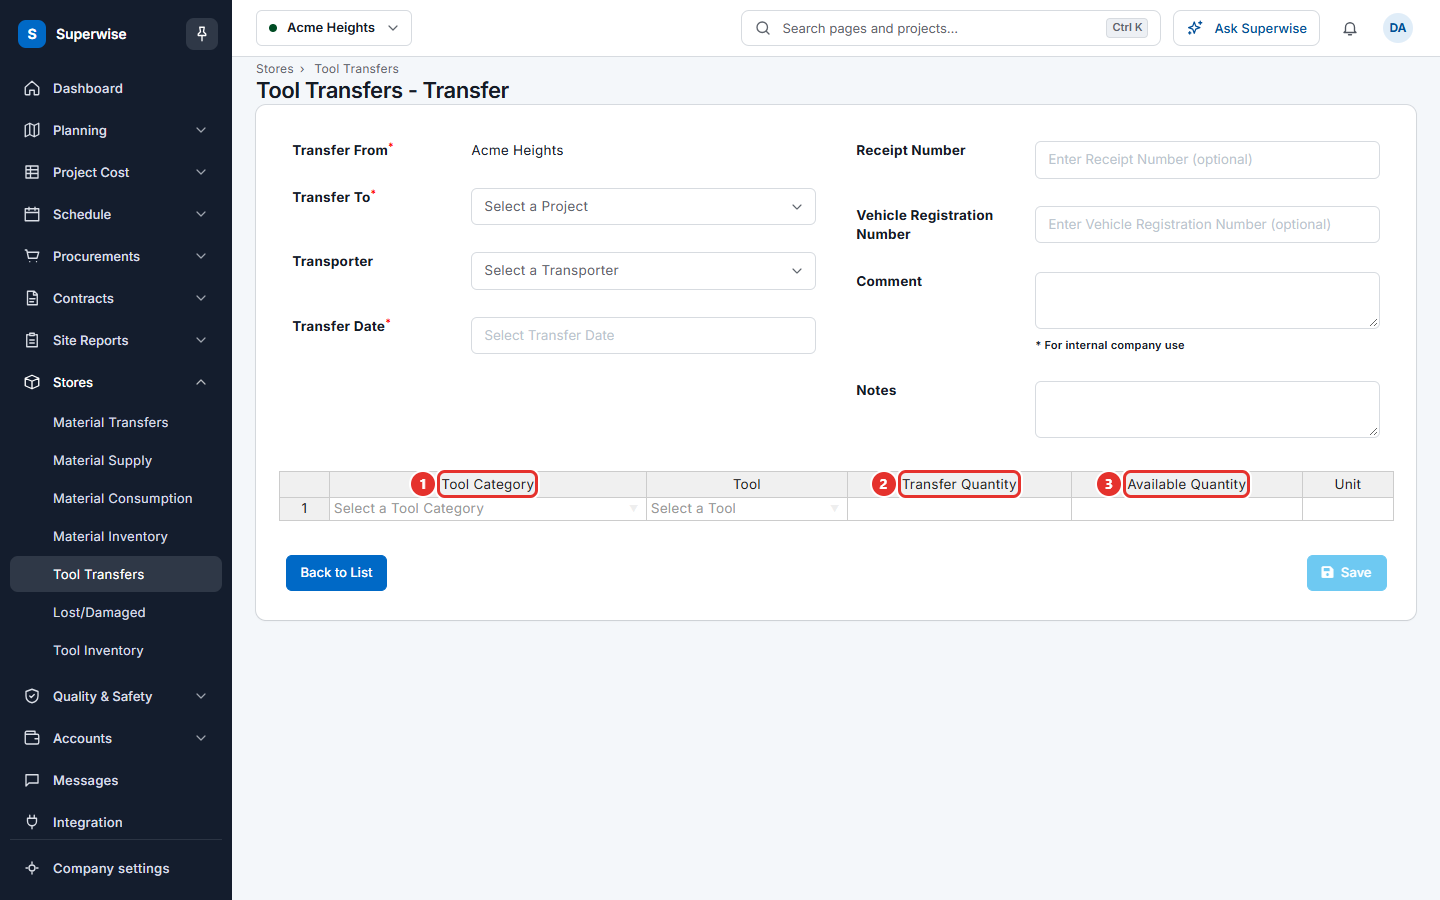
- In the table, add one row for each tool: choose the Tool Category, choose the Tool, and type the Transfer Quantity. The Available Quantity and the Unit are filled by the screen.
- Click Save. The transfer gets the status Initiated and the stock of your project goes down.
To change a transfer, click the three dots at the end of its row in the Transferred tab and choose Edit. You can edit only a transfer with the status Initiated that was made from a project.
How to receive tools
- Open the Received tab (mark 1 in the first picture of this page).
- Click the three dots at the end of the row.
-
Choose Receive. This item shows only for a transfer with the status Initiated.
-
In Receive Date, choose the date and time the tools arrived.
- In the table, type Received Quantity for each tool. Compare it with Transfered Quantity.
- Click Save.
If a transfer from a project arrives with fewer tools than were sent, the screen asks you to confirm. It says "Some items have Transfer Qty greater than Receive Qty. These items will be marked as lost." Click Yes to continue. The missing tools appear in Lost and damaged tools and material.
How to reject, delete or print a transfer
- Click the three dots at the end of the row.
- Choose Reject, Delete or Download PDF.
- For Reject and Delete, click Confirm in the Confirm Action box. For Download PDF, choose Include only Categories or Include only Tools and click Download.
Rules to know
- The receiving project must be different from the sending project.
- Each tool can appear in one row only. Each Transfer Quantity must be above 0 and not more than the Available Quantity.
- All rows of one transfer must be tools. You cannot mix tools and materials.
- Receive Date cannot be before the Transfer Date and cannot be in the future.
- For a purchase order transfer, the PO must be accepted before you can receive it. You cannot receive more tools than the transfer lists. Pending tool transfers made from a purchase order cannot be deleted.
- You cannot delete a transfer when its purchase order is closed. The status column then shows Closed Purchase Order.
- You cannot delete a received transfer when the stock of the receiving project is lower than what the transfer brought. The screen lists the tools that already left for other projects.
If something goes wrong
| What you see | What to do |
|---|---|
| Duplicate Tool are not allowed | A tool is in two rows. Keep one row. |
| Transfer Quantity cannot be greater than Available Quantity | Lower the quantity to the stock of the sending project. |
| PO has to be in Accepted before Tool Transfer can be Received. | Ask the approver to accept the purchase order first. |
| Pending Tool Transfers created from Purchase Orders cannot be deleted. | Receive the transfer, or reject it. |
| Unable to delete because Purchase Order of the Resource Transfer is Closed | The purchase order is closed. You cannot delete this transfer. |
| Transfer cannot be deleted. Following Tools are already transferred to other Projects. | The listed tools left the project. Delete is not possible. |