


Checklists
Build the checklist forms that site teams fill, with the questions, who fills them, how often and who approves.
- Where to find it
- Company settings > Site Monitoring > Checklists/Forms
- Who can use it
- People who have the View Checklists permission. Building a checklist needs Add. Changing one needs Edit. Deleting needs Delete.
A checklist is a form that site teams fill, such as Before concreting checklist or Formwork inspection. In this page you build the form: its name, its questions, who fills it, how often, and who approves it. Site teams then fill the form in a project. The filled forms are separate records. This page covers only the form builder.
The builder has steps: Basic Info, Title Fields, Checklist Fields, Reminders and Summary. You move from one step to the next with the arrows below the form.
Before you start
- Create the projects and roles that will fill the checklist.
- Create an approval workflow if the checklist needs approval. See Company settings > General > Approval Workflows.
- The Reminders step shows only if you can view projects, users and roles.
How to create a checklist
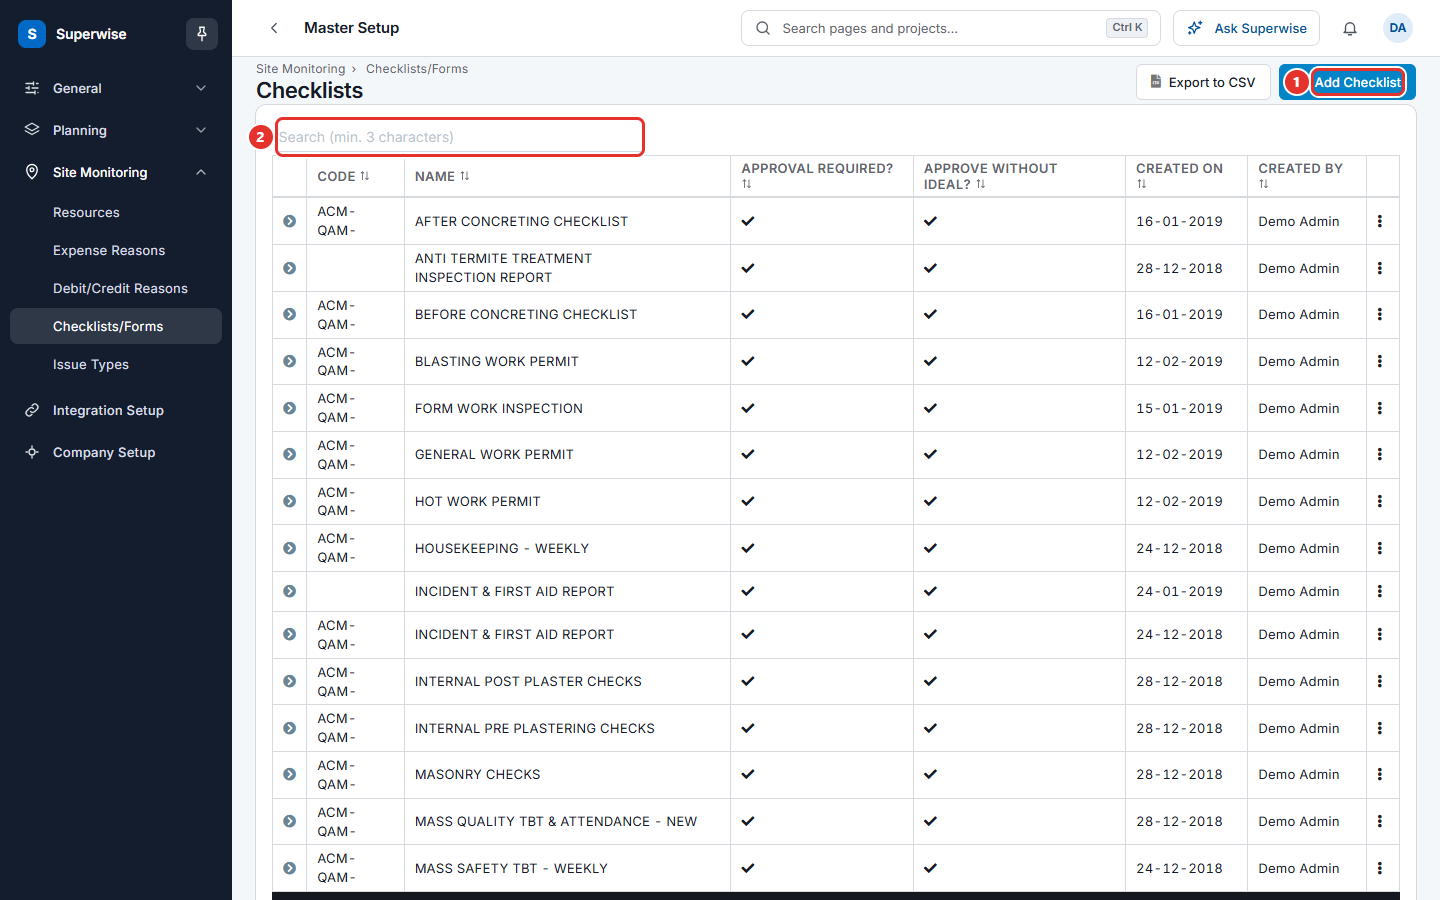
- Open Company settings > Site Monitoring > Checklists/Forms.
- Click Add Checklist (mark 1 in the first picture). The builder opens at Basic Info.
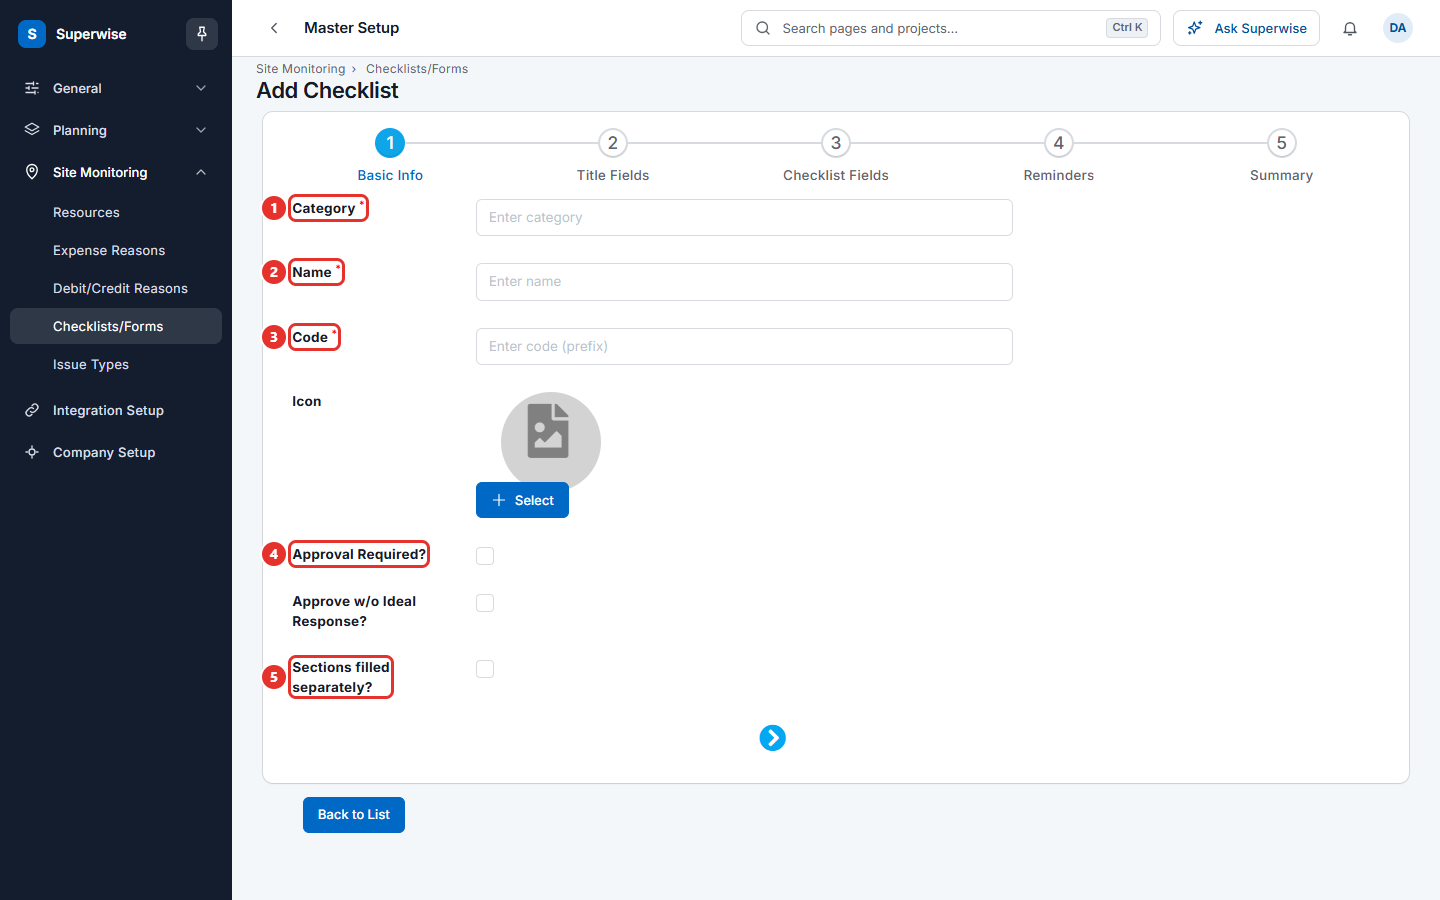
- Type or choose a Category (mark 1 in the second picture). Superwise suggests categories that exist. It needs 3 to 30 characters.
- Type the Name (mark 2). It needs 3 to 40 characters.
- Type the Code (mark 3). This is a prefix. Superwise puts it before the number of each filled form, for example
QA-makesQA-001. - Add an Icon if you want one.
- Tick Approval Required? (mark 4) if a filled form must be approved.
- Tick Approve w/o Ideal Response? to allow approval even when answers differ from the ideal values.
- Tick Sections filled separately? (mark 5) if different people fill different sections of one form.
- Click the right arrow to go to the next step.
How to add title fields
Title fields are the details at the top of the form, such as the date or the site engineer.
- Open the Title Fields step.
- Click Add Title. A new row appears.
- Type the Text of the field.
- Choose the Type of answer. See the table of types below.
- For a List or Multiselect type, type the choices in Options and press Enter after each one.
- Click the edit icon at the end of the row to open more settings. They are Help, Ideal Value, Optional?, Position (L for left or R for right) and an Image.
- Drag the handle at the start of a row to change the order.
How to add checklist fields
Checklist fields are the questions of the form. You group them in sections.
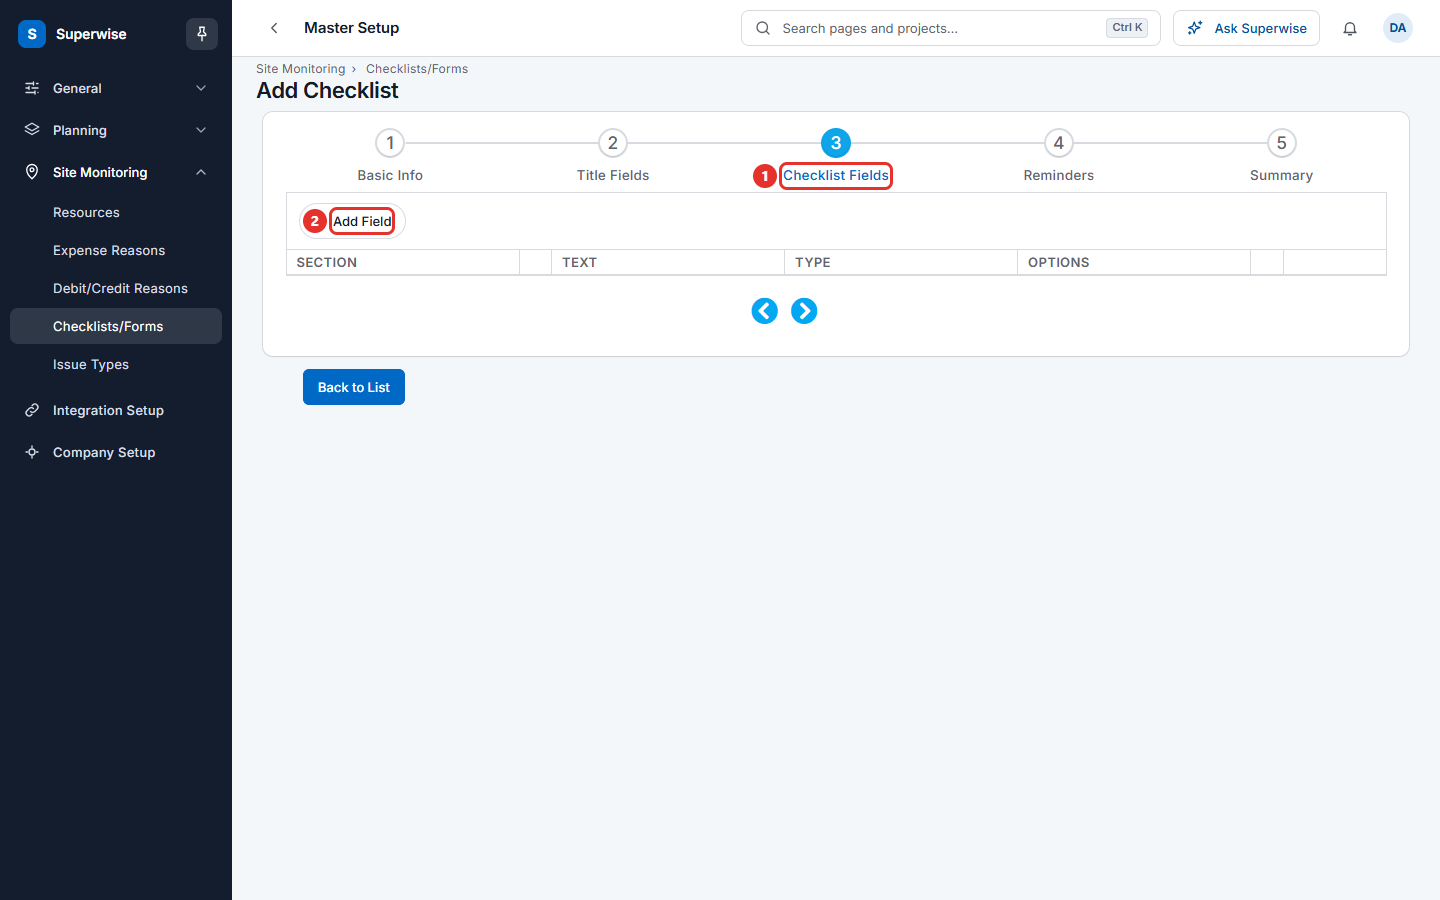
- Open the Checklist Fields step (mark 1 in the picture).
- Click Add Field (mark 2). A row appears under a section named
Section 1,Section 2and so on. - Type the Text of the question and choose the Type of answer.
- For a List or Multiselect type, type the choices in Options.
- Click the edit icon at the end of the row to set Help, Ideal Value and Optional?, and to add an Image.
- To rename a section, click the edit icon next to the section name, type the new name and click the save icon. When Sections filled separately? is on, you can also type Next section in: to say how many days later the next section opens.
- Use the arrows next to a section name to move the section up or down. Drag the handle of a row to move one question.
The types of answer
| Type | Use it for |
|---|---|
| Text | A short answer in words. |
| Multiline Text | A long answer. |
| Boolean | A yes or no answer. |
| Number | A number. |
| List | One choice from your options. |
| Multiselect | Several choices from your options. |
| Date | A date. |
| Date & Time | A date with a time. |
| Images, Video, Audio | A photo, a video or a sound recording. |
| Rating | A rating chosen by the person who fills the form. |
| Signature | A signature. Title fields cannot use this type. |
| Information | A note shown on the form. |
An ideal value is the answer you expect, such as Yes. Do not give an ideal value to Images, Video, Audio, Multiselect or Signature.
How to say who fills a checklist and who approves it
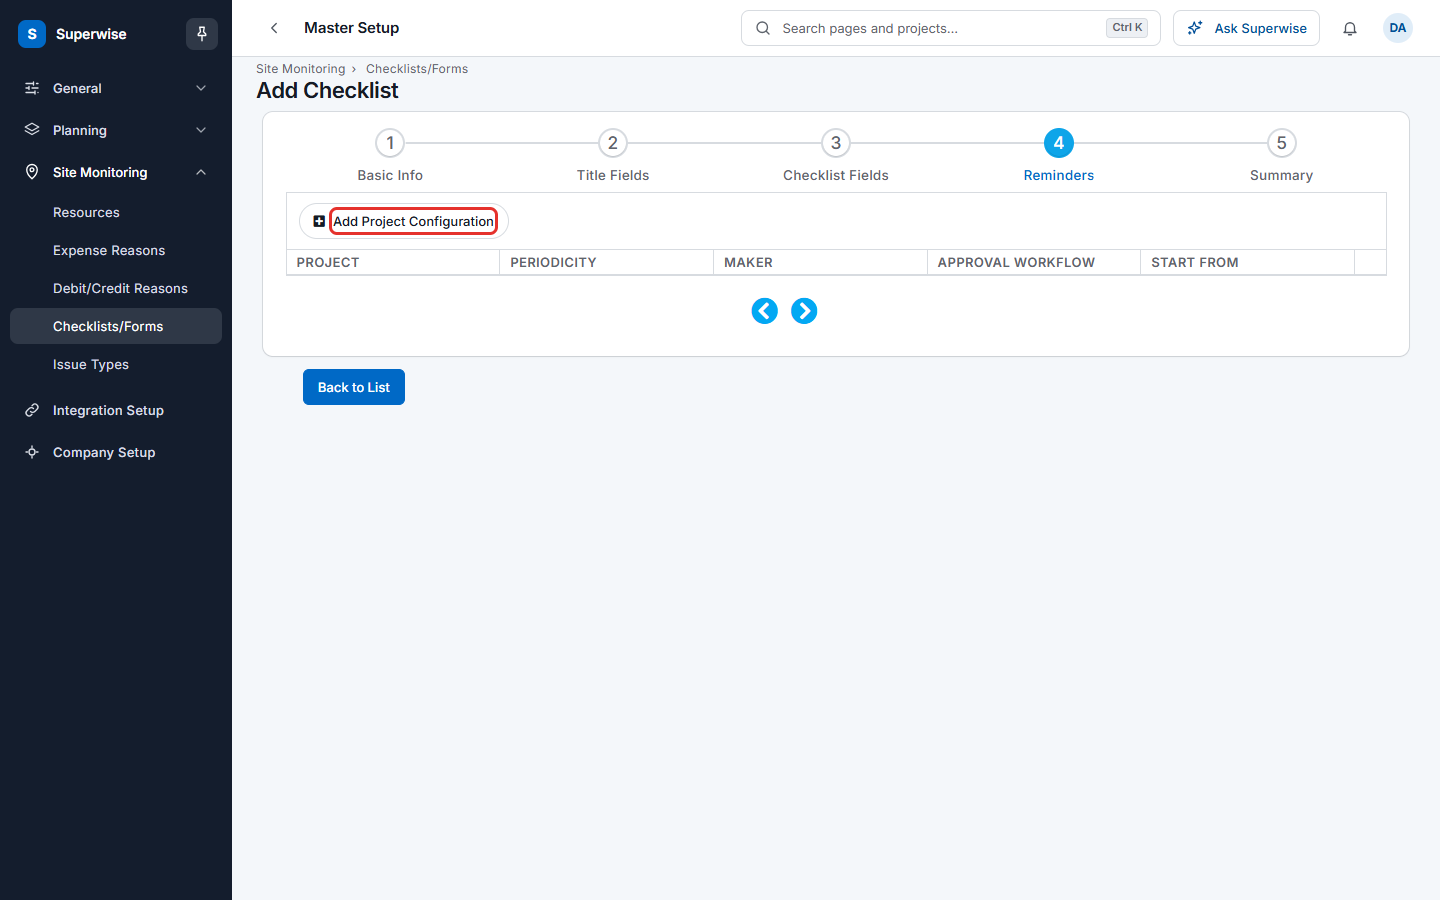
- Open the Reminders step.
- Click Add Project Configuration. A row appears.
- Choose the Project.
- Choose the Periodicity: Daily, Weekly, Fortnightly, Monthly, Activity Linked or On Request.
- Choose the Maker. This is the role that fills the form.
- Choose the Approval WorkFlow. On some accounts this column is named Checker and you choose a role instead.
- Choose the date and time in Start From.
- Click the bin icon to remove a row.
How to check and save the checklist
- Open the last step, Summary. Superwise builds a sample of the form and shows it.
- Read any red message. Fix the step it names.
- Click SAVE. The button shows only on the last step and is grey while the form has errors.
How to edit, print a blank copy or delete a checklist
- On the Checklists list, click the three dots at the end of the row.
- Click Blank Report to download an empty copy of the form.
- Click Edit to open the builder with the saved values.
- Click Delete. A box Confirm Action asks you to confirm. Click Confirm.
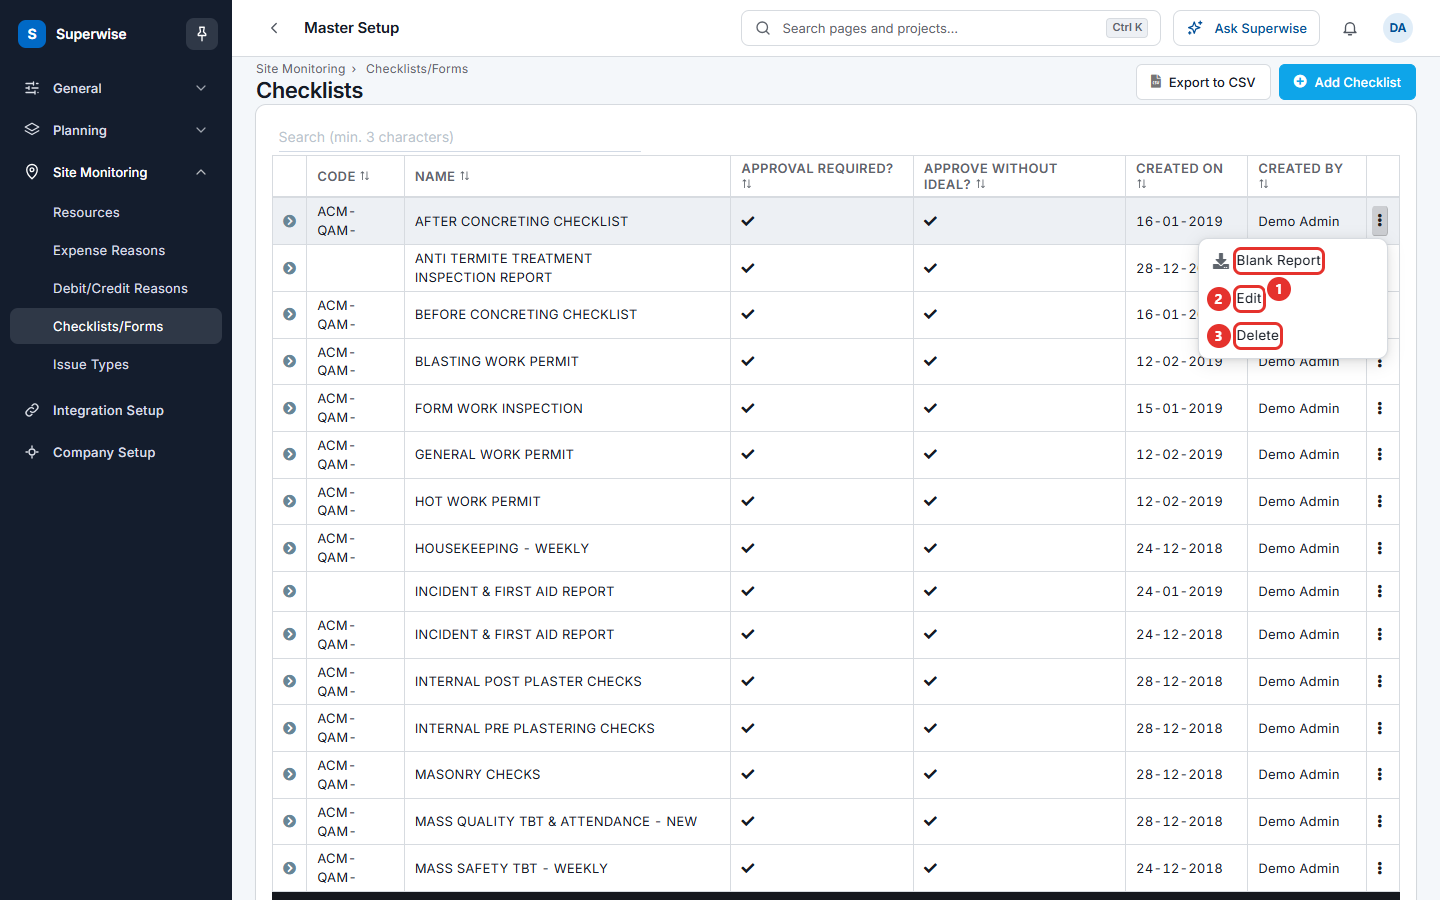
Click the arrow at the start of a row to see the title fields, the checklist fields and the project reminders of that form. Click Export to CSV to download the list.
What the columns mean
| Name | What it means |
|---|---|
| CODE | The prefix of the form numbers. |
| NAME | The name of the checklist. |
| APPROVAL REQUIRED? | A tick means a filled form must be approved. |
| APPROVE WITHOUT IDEAL? | A tick means a form can be approved when answers differ from the ideal values. |
| CREATED ON | The date the checklist was made. |
| CREATED BY | The user who made it. |
Rules to know
- A form name cannot repeat. The system shows Cannot repeat form name.
- The form needs at least one checklist field. The system shows Checklist detail fields have not been added.
- A section name is required for every checklist field.
- If Approval Required? is on, add at least one project configuration with an approval workflow or an approver role. If it is off, remove the workflow or role.
- A project can appear only once in the project configurations.
- You cannot delete a checklist that is linked to material deliveries. The system shows Checklist is linked with Material Deliveries.
- If forms were already filled, delete asks again. The message is Checklist has already been filled. The button then reads Force Delete?. Click it only when you accept losing that link.
If something goes wrong
| What you see | What to do |
|---|---|
| Category is Required or Name is Required or Code is Required | Fill the field on the Basic Info step. |
| Cannot repeat form name | Choose another name. |
| Checklist detail fields have not been added | Add at least one field on the Checklist Fields step. |
| Project Checklists along with Approval Workflow/Approver Role needs to be defined. | Open Reminders, add a project and choose a workflow or role. |
| Duplicate Projects have been added to the checklist. | Keep one row for each project. |
| Ideal value need not be specified for Images/Video/Audio/Multiselect/Signature | Clear the Ideal Value of those fields. |
| Checklist has already been filled | Click Force Delete? if you want to delete anyway. |
Related pages
- Resources: a material can use a checklist as its quality check at delivery.
- Templates: template tasks can use a checklist at start and at finish.
- Site monitoring masters: the order to set up the site lists.