


Add a measurement sheet
Record the measured quantity of one BOQ item in a project, step by step, with its dimensions and material consumption.
- Where to find it
- Site Reports > Measurement Book
- Who can use it
- People who have the Add Measurement Book permission.
Use this form to record one measurement. You choose the BOQ item, enter the size of each part of the work, and save. The form has steps. The steps are BOQ, Measurement and Material Consumption. When the project has tasks that you may see, the form also has a first step Task.
Before you start
- The project must have a bill of quantities (BOQ) with items to measure.
- If the project works with tasks, the task must exist in the schedule.
- If a message says Project does not have any Task to add Measurement currently, no task can be measured yet.
How to add a measurement sheet
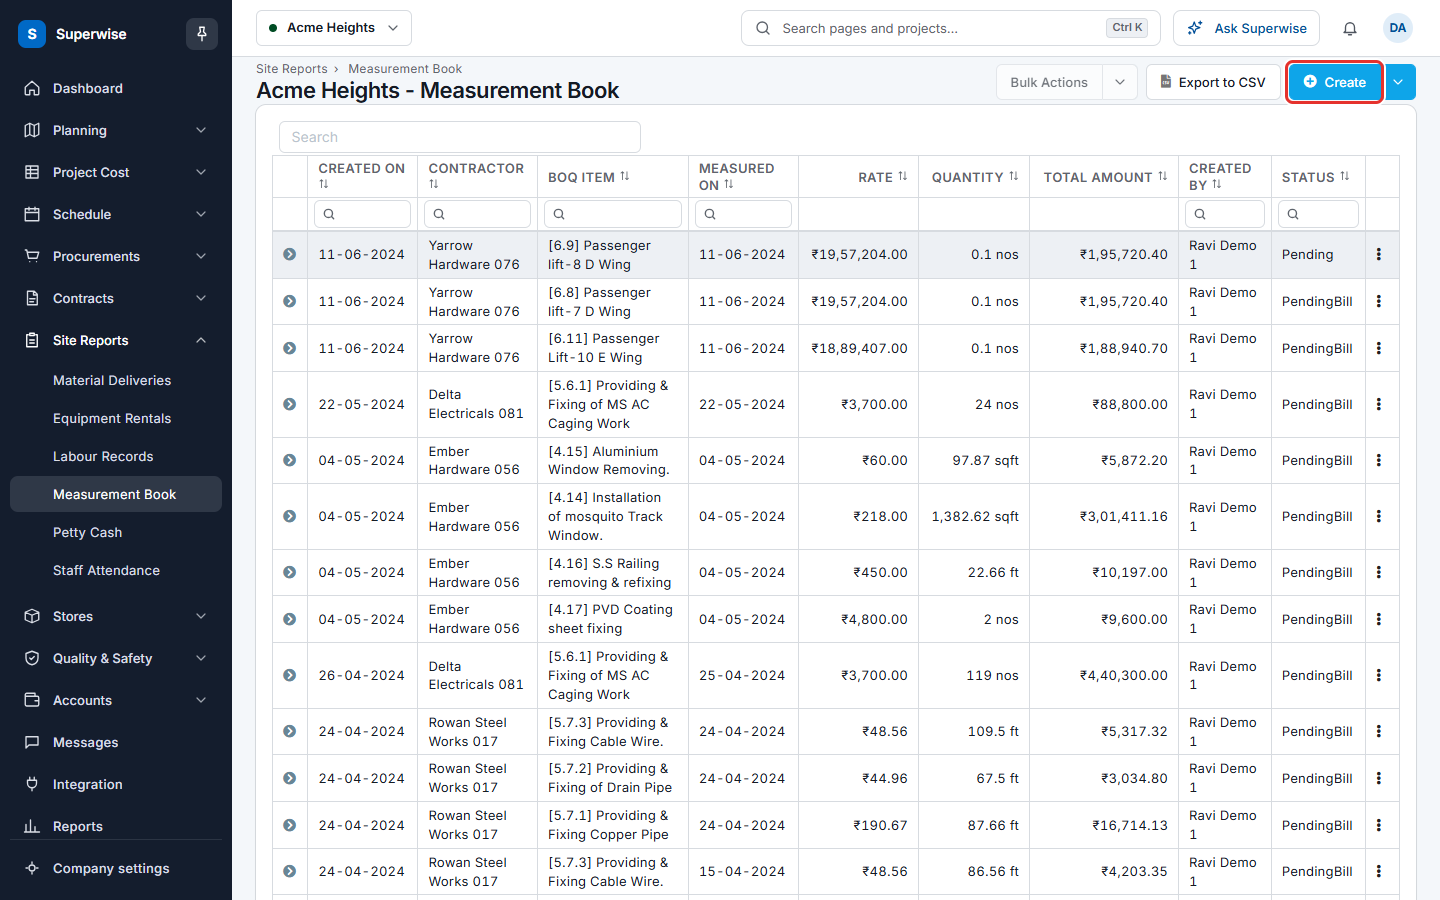
- Open Site Reports > Measurement Book.
- Click Create (mark 1 in the first picture below). The form opens in a new tab.
- If the form has the step Task, choose the Area. Type at least 3 letters to search. Then choose the Activity. Click the arrow at the bottom of the form to go on.
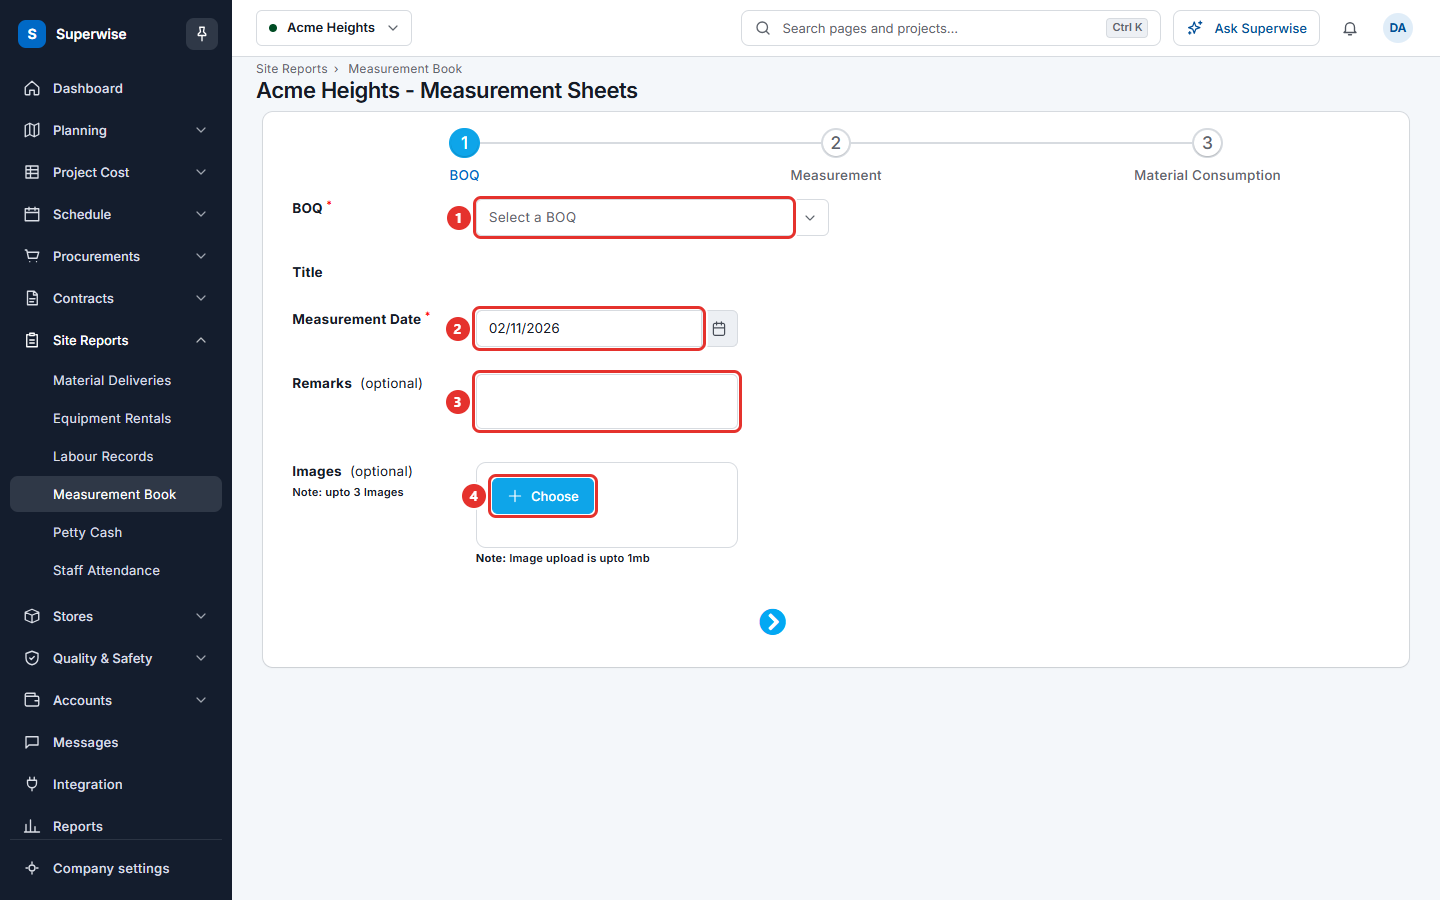
- In the step BOQ, choose the BOQ item (mark 1 in the second picture). Superwise shows its title.
- Choose the Measurement Date (mark 2). You cannot choose a date in the future.
- If you want, fill in Remarks (mark 3) and add up to 3 Images (mark 4). Each picture can be up to 1 MB. The images are available only when no Area is chosen.
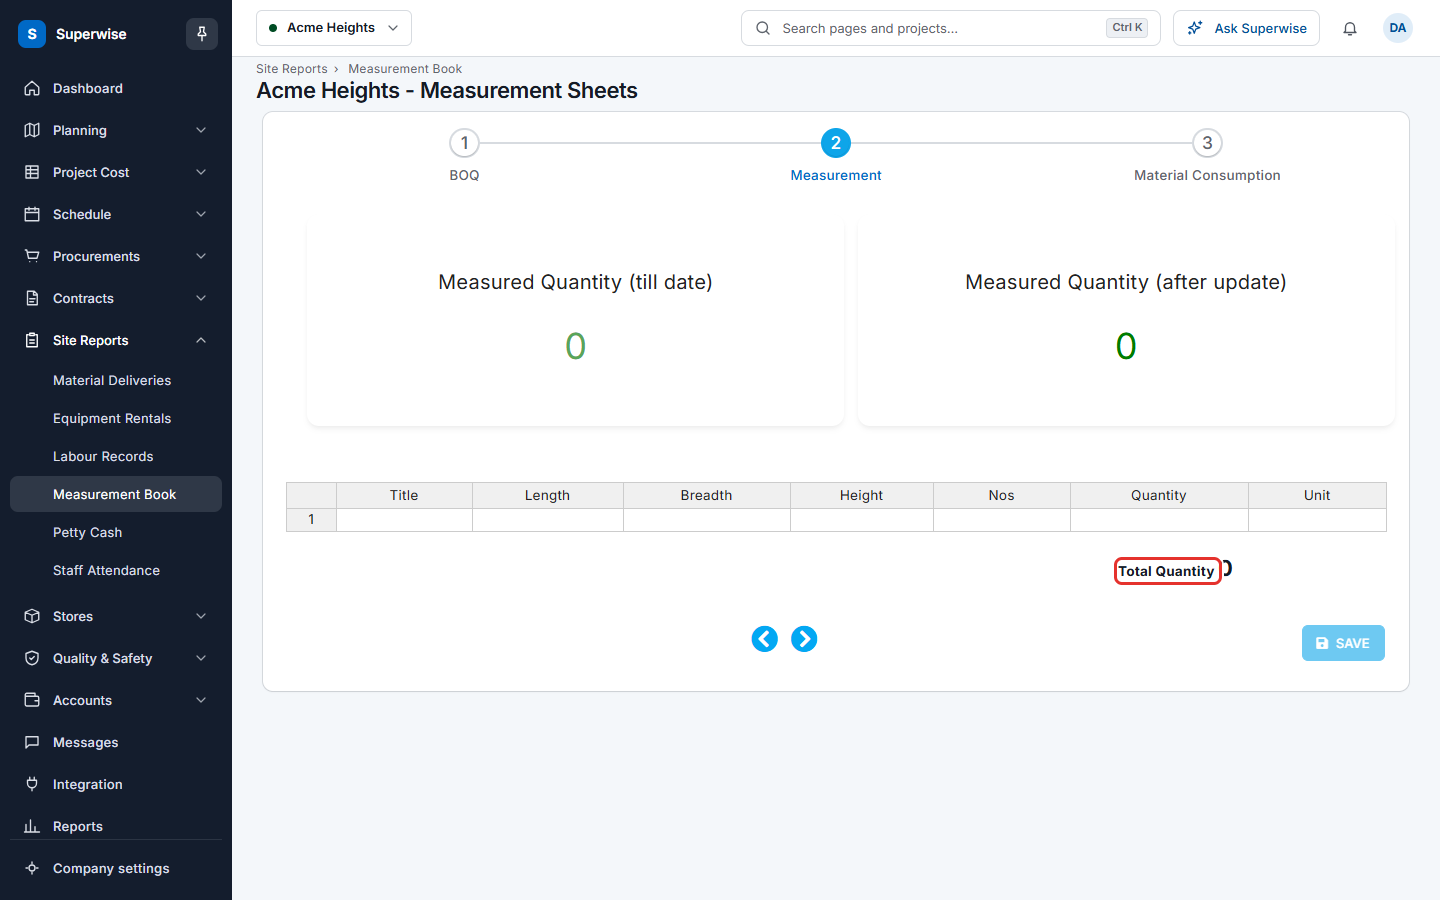
- Click the arrow at the bottom of the form, or click Measurement at the top, to open the step Measurement. Fill one row of the grid for each part of the work. Use the columns Title, Length, Breadth, Height and Nos. See the table below.
- Check the three boxes at the top: Estimated Quantity, Measured Quantity (till date) and Measured Quantity (after update). The Total Quantity (mark 1 in the third picture) is shown under the grid.
- If the work was done by a contractor, go to the step Material Consumption. Choose the Contractor and, if needed, a Debit / Credit Reason. Fill the grid with the material that the contractor used.
- Click SAVE.
If the total goes over the estimate, a dialog says that a service request is created automatically. Click Yes to go on or No to go back. A measurement that goes over cannot be accepted until the service request is approved.
What the fields mean
| Name | What it means |
|---|---|
| Area | The area of the project where the work was done. |
| Activity | The task in that area. |
| BOQ | The item of the bill of quantities that you measure. |
| Measurement Date | The day the work was measured. |
| Remarks | An optional note. |
| Images | Optional pictures of the work. |
| Title (grid) | A short name of the part, for example Room 401 north wall. |
| Length, Breadth, Height (grid) | The size of one part. Length is required. Fill the others when they apply. |
| Nos (grid) | How many times the part repeats. |
| Quantity (grid) | Worked out by Superwise: Length multiplied by Nos, Breadth and Height. A part that is marked as a deduction counts as a minus. |
| Contractor | The contractor who did the work. |
| Debit / Credit Reason | The reason that is used in the contractor's ledger. |
| Resource Name, Quantity (consumption grid) | The material and the quantity that was used. |
| Credited? | Tick when the quantity is a credit. |
Rules to know
- The grid keeps one empty row at the end for the next part.
- Unless the company allows it, the measured quantity cannot go over the quantity of the BOQ item.
- The sheet starts as Pending.